Features of Moxie CRM Client Portal
– 📌 Custom Branding: Ensure your portal looks as professional as your business.
– 🛠️ Feature Management: Enable or disable features to meet your clients’ needs.
– 🌐 Custom Domain Setup: Learn how to set up a one-link easy access portal.
– 🔧 Customization: Tailor your portal with custom pages, colors, and fonts.
– 📝 Permissions: Control access to various features and tasks for each client.
– 🤝 Client Interaction: Set up external links and iframe contents for a fully interactive experience.
– 🛠️ Troubleshooting Tips: Get solutions for common issues and optimize your portal for the best user experience.
Elevate Client Management with Moxie’s Client Portal
Introduction
In today’s digital era, managing client interactions efficiently is crucial. Moxie’s client portal offers a robust solution, blending ease of use with extensive customization options. This blog post will guide you through the intricate process of setting up and customizing your client portal in Moxie, ensuring you can provide a seamless experience for your clients.
I also have a Moxie CRM Course for Beginner’s that will walk you through the entire Moxie setup process.
Customizing Your Brand in Moxie CRM
The first step in setting up your client portal is to establish your brand identity. In Moxie, you can configure your brand settings to align with your company’s visual identity and values. This involves customizing your company logo, selecting colors that resonate with your brand, and including other branding elements that consistently represent your business.
By establishing a strong brand identity within the portal, you create a professional and cohesive experience for your clients.
Customizing your brand isn’t just about aesthetics; it’s also about user experience. A well-branded portal can enhance the usability for clients as they interact with a familiar visual environment.
Configuring the Login Screen
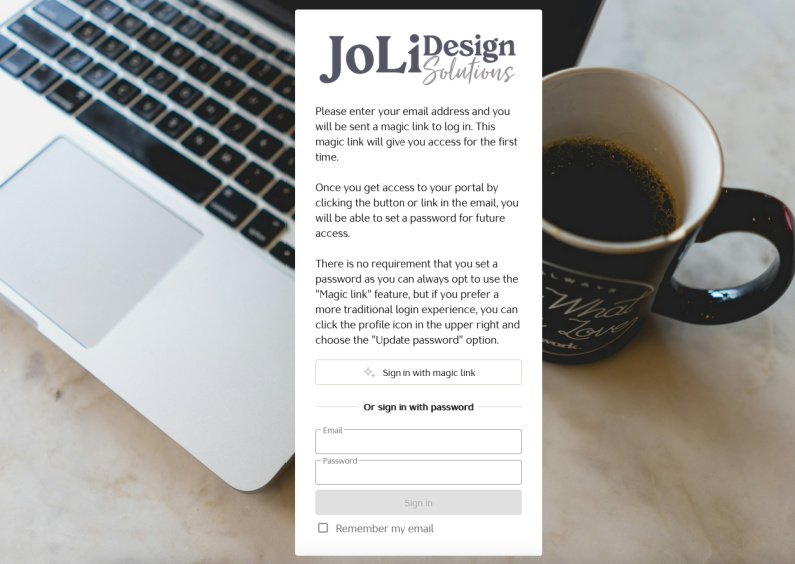
A client’s first interaction with your portal is through the login screen, which is a prime opportunity to make a lasting positive impression. In Moxie, you have the ability to customize the login screen to reflect your brand identity.
It’s important to not only add your logo and brand colors but also including custom messages and images that welcome clients and provide a sense of personalization from the very start.
Creating a visually appealing and on-brand login screen also contributes to the overall user experience. Clients are more likely to feel comfortable and confident logging into a portal that looks professional and is clearly branded. This first impression can set the tone for their entire interaction with your services.
Customizing the login screen can include functional elements such as direct links to support resources or instructional content. This ensures that clients have immediate access to help if needed, potentially reducing the number of support queries and enhancing client satisfaction. Integrating these elements thoughtfully can improve the overall client experience right from the point of login.

Creating Custom Pages and Content
One of the standout features of Moxie’s client portal is the ability to create custom pages tailored to your clients’ specific needs. This functionality allows you to add valuable information and services directly within the portal, making it a one-stop-shop for clients.
It’s simple to add custom content using iframes and external links, which can be particularly useful for integrating third-party services or additional resources.
In creating these custom pages, you can cater to various client-specific requirements by providing dedicated sections for different services or information. For instance, a custom page can include FAQs, industry-specific updates, or personalized reports that are relevant to individual clients.
This targeted approach not only adds value to the client portal but also helps in building stronger client relationships by showing that you understand and cater to their unique needs.
Custom pages also allow for greater flexibility and personalization. You can arrange these pages based on the preferences or needs of specific clients, ensuring relevant information is always at their fingertips.
Setting Up Custom Codes and Features
To further personalize the client portal, Moxie provides options for setting up custom codes and enabling or disabling various features. This flexibility allows you to tailor the portal to better meet the specific needs of your clients.
By setting up custom fields and mapping them, you can add functionalities that are unique to your business processes. For example, if you require specific fields in forms or additional client data, these fields can be implemented to capture and reflect that information accurately.
This level of customization ensures that the client portal is not only user-friendly but also comprehensively aligned with your workflow requirements.
Enabling and disabling features based on client needs is another powerful aspect of Moxie’s client portal customization. Whether you want to simplify the interface for certain users by hiding advanced features or ensure that only specific clients have access to certain tools, these options provide the necessary control.
In my course I go into detail for different scenarios where these settings can be applied, helping you to create a streamlined and relevant user experience for each client.
Establishing a Custom Domain
Enhancing the professionalism of your client portal can be significantly achieved by setting up a custom domain. This not only makes the portal more easily accessible to clients but also aligns it closely with your brand.
A custom domain can boost your brand’s credibility by providing a consistent web address that clients can easily remember and trust. Having a custom domain can improve search engine visibility, making it easier for clients to find and access the portal.
The advantage of using a custom domain extends beyond aesthetics and professionalism; it’s also about security. A properly configured domain with SSL encryption helps protect client data and build trust in the portal’s security measures.
Managing Client Permissions and Access
In Moxie’s client portal, managing client permissions and access levels is crucial for ensuring that clients interact with the portal in a manner that suits their needs and your business requirements.
There are various options for configuring client access, ranging from read-only permissions to full project collaboration capabilities. This flexibility allows you to tailor the user experience for each client based on their specific roles and responsibilities.
Providing different levels of access helps in maintaining appropriate control and security within the portal. For instance, some clients may only need to view reports and documents, while others might require the ability to comment on tasks, upload files, or collaborate on projects actively.
Setting these permissions ensures that you can customize access without compromising on security or functionality.
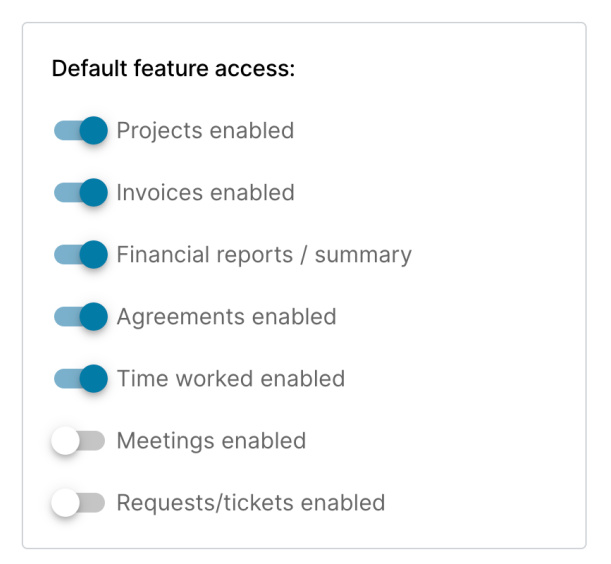
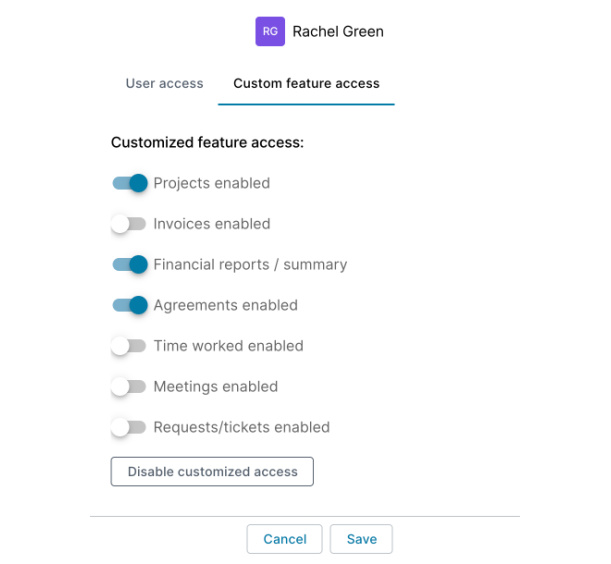
In the examples below are the default settings I have in my client portal and the custom settings for my “client”, Rachel Green. 😆


Utilizing Client-Specific Features
Tailoring your portal’s experience to meet the diverse needs of your client base is one of Moxie’s standout capabilities. You can configure the client portal to show or hide certain features and pages for specific clients, ensuring a customized experience that caters to individual client requirements.
Customizing the features visible to each client allows for a more relevant and streamlined user experience. For example, you might want to provide advanced tools and options to more tech-savvy clients while keeping the interface simple for others.
In the Moxie CRM Beginner’s Course I teach you how to manage these settings effectively within the portal, ensuring that each client sees only what they need and nothing that could overwhelm or confuse them.
This customization capability also extends to managing client tasks. You can assign tasks with due dates, allow clients to interact by adding comments, attaching files, and marking tasks as completed.
Providing clients with a tailored set of features not only improves their satisfaction but also enhances the efficiency of their interactions with your business.
Conclusion
Setting up a client portal in Moxie is a multifaceted process that, when done correctly, can significantly enhance client satisfaction and streamline your business operations. Each step, from customizing your brand to managing individual client permissions, plays a vital role in creating a seamless and engaging client experience.
The ability to personalize the portal not only helps in establishing a strong brand identity but also ensures that clients find the portal intuitive and easy to navigate. Whether it’s setting up a custom domain or creating specific pages for different clients, these customization options enable you to provide a truly tailored experience that can lead to improved client relationships and higher satisfaction rates.
Ultimately, the client portal is a powerful tool that can streamline your workflows, enhance collaboration, and provide clients with a centralized hub for their interactions with your business.


