If you have a web design business, (or any service-based business for that matter) I’m sure you have email templates that are used to communicate with clients. Creating emails from scratch in Moxie each time can be a time-consuming task – but when you have email templates it can save you a ton of time.
Step 1: Accessing and Setting Up Your Email Templates
To begin creating your email templates, you must first navigate to the correct section within Moxie.
- Navigate to Workspace Settings: At the bottom of your Moxie workspace, look for the ‘Workspace Settings’ option and click on it.
- Select Templates
- Choose the Email Templates Section
This area is your starting ground for all things related to email templates. Whether it’s for invoicing, client inquiries, or project updates, everything begins here.
Step 2: Organizing and Creating Your Initial Templates
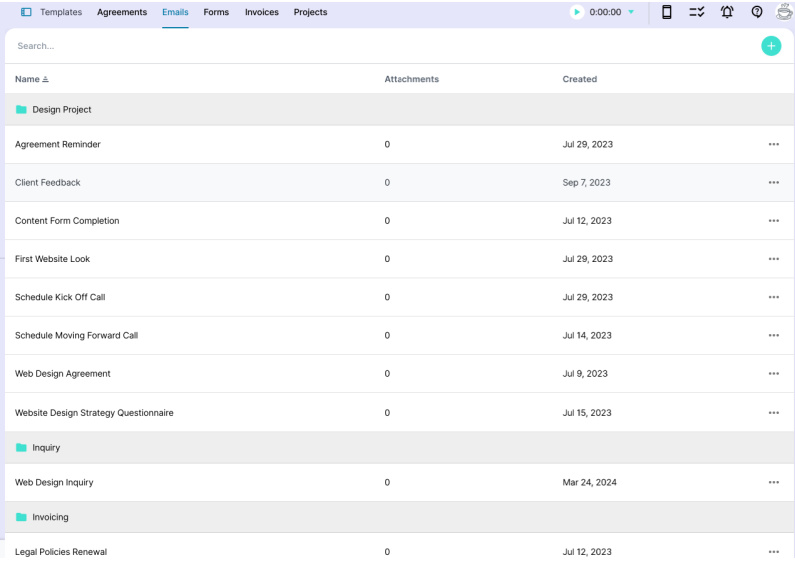
Moxie has folders so you can organize and manage your email templates, which is ideal for businesses with multiple services and corresponding communication needs.
- Organization Using Folders: You can create folders to categorize your templates according to different services or project types. For instance, if your business deals primarily with web design, you can have folders named after each specific phase or type of communication like ‘Web Design Inquiry’ or ‘Web Design Agreement’.
- Creating a Basic Email Template: Start by adding a blank template or duplicating an existing one that closely matches your needs. You can also use the template library Moxie provides. There are templates for different types of businesses such as Creatives and Virtual Assistants.
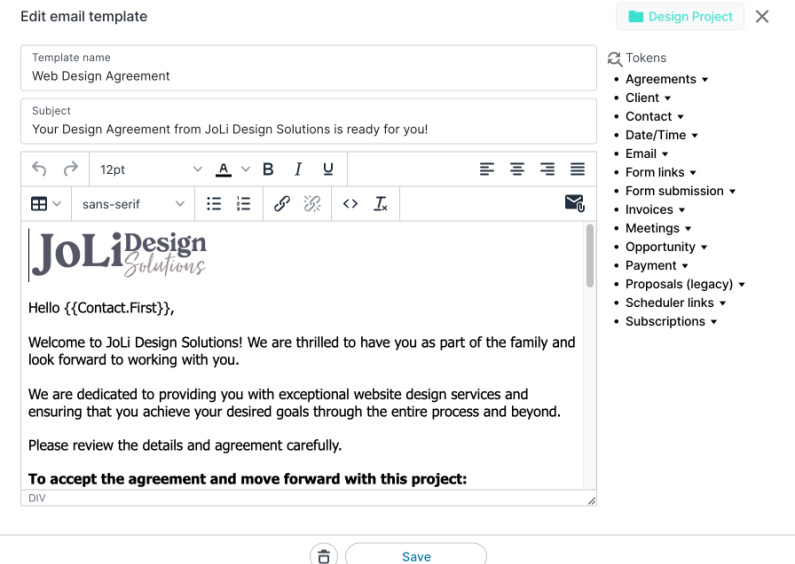
- Incorporating Essential Elements: Include elements like invoicing details or consultation links in your template. For example, in an inquiry response email, add a token that auto-fills with the contact’s first name to personalize the greeting.
Useful Tip for Organizing Email Templates:
I encourage you, especially if you are in the beginning stages of setting up your Moxie to utilize the template library, a resourceful feature for finding and importing pre-designed templates tailored to common business needs like invoices, payment confirmations, and client communications.

Step 3: Enhancing and Utilizing Advanced Features
Once your basic templates are ready, get fancy with advanced formatting, tokens, and even direct links to external platforms.
- Customizing with Links and Tokens: Place links to useful resources, scheduling tools, or contact forms within your email. Use tokens effectively to automate data like client names, invoice numbers, and due dates. This automation not only saves time but also reduces the chances of manual errors.
- Adding Visual Elements: Incorporate your brand’s logo or specific images from your website to make emails more professional and visually appealing. Use the HTML code section to stylize aspects like buttons that link to payment portals or appointment books.
- Setting Up and Using Email Signatures: Personalize emails further with custom signatures created through whatever platform you are using. You can also use Moxie’s default signature tokens for a consistent finish across all business communication.

Conclusion:
Implementing structured, well-organized email templates is not just about efficiency; it’s about enhancing the professionalism and responsiveness of your business communication. Using email templates as part of your workflow is super easy and saves you a ton of time!
Moving forward in setting up your Moxie, I encourage you to experiment with the creation and modification of these templates.
1. Creation and Use of Email Templates
– By starting with creating effective email templates, businesses can streamline communication related to agreements, forms, invoices, and projects, ensuring consistency and saving time.
2. Organization of Email Templates
– Organizing email templates into specific folders based on their purpose or project helps in efficiently managing communications. This method enhances accessibility and clarity, especially for businesses offering multiple services.
3. Customization of Content in Emails
– Customization options within email templates, such as adding personal touches like greeting tokens or incorporating styles for buttons and logos, help in personalizing the client experience. This tailoring makes interactions more engaging and aligned with the brand’s voice.
4. Utilization of Template Libraries and Features
– Leveraging template libraries and pre-set templates (like Moxie’s essential emails) can significantly accelerate the process of creating standardized communication formats. This approach not only ensures professionalism and consistency but also allows for customization to fit the specific needs of the business.


